How to apply scar wax and remove it after
Have you ever wanted to transform into a zombie for Halloween, but felt like your makeup skills weren’t up to par? Or maybe you’re an actor looking to add some realistic scars to your character’s appearance for a film or stage production. Whatever your reason may be, learning how to apply scar wax can take your costume or performance to the next level.
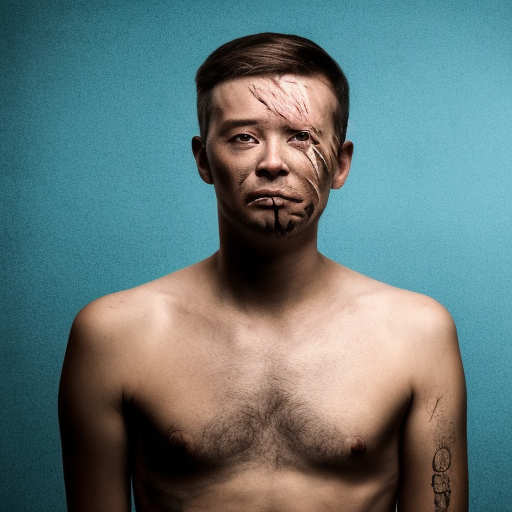
Take your costume to the next level with scar wax
Scar wax (affiliate link), also known as scarring wax or skin wax, is a special makeup product used to create the illusion of wounds, scars, and other skin abnormalities on the face and body. It is made of a soft, pliable material that can be molded and shaped to create the desired effect.
Using scar wax is a bit more involved than simply applying regular makeup, but with a little practice and attention to detail, you can create professional-looking scars and wounds that will impress everyone around you. In this blog post, we’ll go through the steps for applying scar wax, as well as some tips and tricks to help you get the best results.
Create professional-looking scars with these easy steps
Before you get started, you’ll need to gather a few supplies:
- Scar wax
- Spirit gum or latex adhesive
- Powder (either talc or cornstarch will work)
- Makeup brush or sponge
- Makeup remover or baby oil
- A mirror
Step 1: Prepare the area
Before you begin applying the scar wax, it’s important to prepare the area where you’ll be applying it. Start by cleaning your skin with a mild soap and water, and then dry it thoroughly. If you have any facial hair, you may want to shave or trim it down to make it easier to apply the wax.
Step 2: Apply the adhesive
Next, it’s time to apply the adhesive that will help the scar wax stick to your skin. There are two main options for this: spirit gum and latex adhesive. Spirit gum is a clear, sticky substance that is applied to the skin with a brush or cotton swab. It dries quickly and creates a strong bond, but it can be difficult to remove. Latex adhesive is another option that is applied in a similar way, but it is easier to remove and may be more suitable for sensitive skin.
To apply the adhesive, start by squeezing a small amount onto a clean surface, such as a palette or the back of your hand. Then, use a brush or cotton swab to apply a thin layer of adhesive to the area where you will be applying the scar wax. Allow the adhesive to dry completely before moving on to the next step.
Step 3: Shape the scar wax
Now it’s time to shape the scar wax into the desired shape and size. To do this, simply take a small piece of wax and roll it between your fingers until it is soft and pliable. Then, mold it into the desired shape, using a makeup brush or your fingers to smooth it out and refine the edges. You can make the scar wax as realistic or as exaggerated as you like, depending on the look you’re going for.
Step 4: Apply the scar wax
Once you have shaped the scar wax to your liking, it’s time to apply it to your skin. To do this, simply press the wax onto the adhesive-covered area, using a makeup brush or sponge to smooth it out and blend it into the surrounding skin. Use a light touch and work slowly to avoid tearing or stretching the wax.
Step 5: Set with powder
Once you have applied the scar wax, it’s a good idea to set it with a light dusting of powder. This will help to absorb any excess adhesive and give the scar wax a more natural, matte finish. To do this, simply use a makeup brush or sponge to apply a thin layer of powder over the scar wax. You can use either talc or cornstarch for this step.
Step 6: Blend and refine
At this point, your scar wax should be looking pretty good, but you may want to take a few extra steps to really make it look realistic. Start by using a makeup brush or sponge to blend the edges of the scar wax into your skin, using small, circular motions to create a seamless look. You can also use a small amount of foundation or concealer to further blend the scar wax into your skin and create a more natural look.
Step 7: Add details
To make your scar wax really stand out, you can add some extra details to give it a more realistic appearance. For example, you can use a small amount of red or brown makeup to add some bruising or discoloration around the edges of the scar. You can also use a thin brush or toothpick to add some fine lines or other details to the scar wax, such as scratches or stitches.
Step 8: Remove the scar wax
When you’re ready to remove the scar wax, start by gently peeling it off your skin. If it doesn’t come off easily, you can use a small amount of makeup remover or baby oil to help loosen it up. Be gentle to avoid damaging your skin. Once you have removed the scar wax, use a gentle cleanser to remove any remaining adhesive or makeup, and follow up with your usual skincare routine.
Tips and tricks
- If you’re having trouble getting the scar wax to stick to your skin, you can try applying a second layer of adhesive. Just be sure to let the first layer dry completely before applying the second layer.
- If the scar wax starts to dry out or become too stiff to work with, you can add a small amount of petroleum jelly or oil to help soften it up.
- To make the scar wax look more realistic, you can add some shading by using a darker color around the edges and a lighter color in the center.
- If you’re using scar wax to create a large wound or scar, you can use a small amount of cotton or tissue paper to create a more realistic texture. Simply crumple the cotton or tissue paper into a ball and press it into the scar wax while it is still soft.
- If you make a mistake while applying the scar wax, don’t panic! Simply use a makeup brush or sponge to smooth out the area, or use a small amount of makeup remover or baby oil to remove the scar wax and start over.
Conclusion
Learning how to apply scar wax is a fun and creative way to add some excitement to your Halloween costume or performance. With a little practice and attention to detail, you can create professional-looking scars and wounds that will impress everyone around you. By following the steps outlined above and using some of the tips and tricks we’ve shared, you’ll be well on your way to mastering the art of scar wax application.